A Siri Shortcut to Generate PWA Icons and Web App Manifest
If you've been following along with my daily blogging challenge, this is my final article! I've done 30 articles in 42 days!
Since Siri Shortcuts were announced in iOS 12, I’ve been trying to find some interesting and useful applications for it. Suprisingly, it packs a lot of power and is actually a great automation tool. In addition to being able to run actual scripts, we can do things image manipulation, which gave me the idea of creating a shortcut to automate the generation of the different icon sizes for progressive web applications.
Using the shortcut #
To use the shortcut, all you need to do is pass in the name of the application and the original icon file. Here's what that looks like:
The shortcut will generate icons in sizes 32px, 48px, 128px, 144px, 152px, 192px, 256px, and 512px. Additionally, a basic manifest.json file is generated along with a head.html file with <link>s to all the icons.
manifest.json
{
    "name": "bitsofcode",
    "start_url": "/",
    "scope": "/",
    "display": "standalone",
    "background_color": "#fff",
    "icons": [
        {
            "src": "/icon-32.png",
            "sizes": "32x32",
            "type": "image/png"
        },
        {
            "src": "/icon-48.png",
            "sizes": "48x48",
            "type": "image/png"
        },
        {
            "src": "/icon-128.png",
            "sizes": "128x128",
            "type": "image/png"
        },
        {
            "src": "/icon-144.png",
            "sizes": "144x144",
            "type": "image/png"
        },
        {
            "src": "/icon-152.png",
            "sizes": "152x152",
            "type": "image/png"
        },
        {
            "src": "/icon-192.png",
            "sizes": "192x192",
            "type": "image/png"
        },
        {
            "src": "/icon-256.png",
            "sizes": "256x256",
            "type": "image/png"
        },
        {
            "src": "/icon-512.png",
            "sizes": "512x512",
            "type": "image/png"
        }
    ]
}
head.html
<head>
    <title>bitsofcode</title>
    <link rel="manifest" href="/manifest.json">
    <link rel="icon" type="image/png" sizes="32x32" href="/icon-32.png">
    <link rel="icon" type="image/png" sizes="48x48" href="/icon-48.png">
    <link rel="icon" type="image/png" sizes="128x128" href="/icon-128.png">
    <link rel="icon" type="image/png" sizes="144x144" href="/icon-144.png">
    <link rel="icon" type="image/png" sizes="152x152" href="/icon-152.png">
    <link rel="icon" type="image/png" sizes="192x192" href="/icon-192.png">
    <link rel="icon" type="image/png" sizes="256x256" href="/icon-256.png">
    <link rel="icon" type="image/png" sizes="512x512" href="/icon-512.png">
    <meta name="apple-touch-icon" sizes="152x152" href="/icon-152.png">
    <meta name="msapplication-TileImage" sizes="144x144" href="/icon-144.png">
</head>
Breaking it down #
The syntax of Siri Shortcuts can take a while to get used to, but it is actually quite similar to regular code. We can have variables, if/else statements, loops, and even structured data like arrays and objects.
You can view an image of the full shortcut here, but here is a breakdown of each step and what it does.
Get application name #
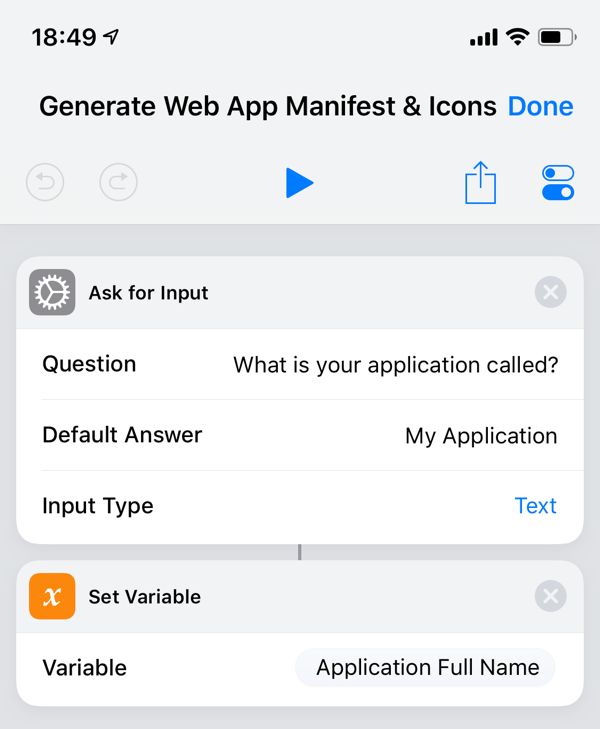
The first thing I do is prompt the user for the name of the application and save it to the Application Full Name variable. I use this variable to name the folder that the resulting icons and files are stored to, as well as to fill in the name in the web app manifest.
Get full-sized icon #
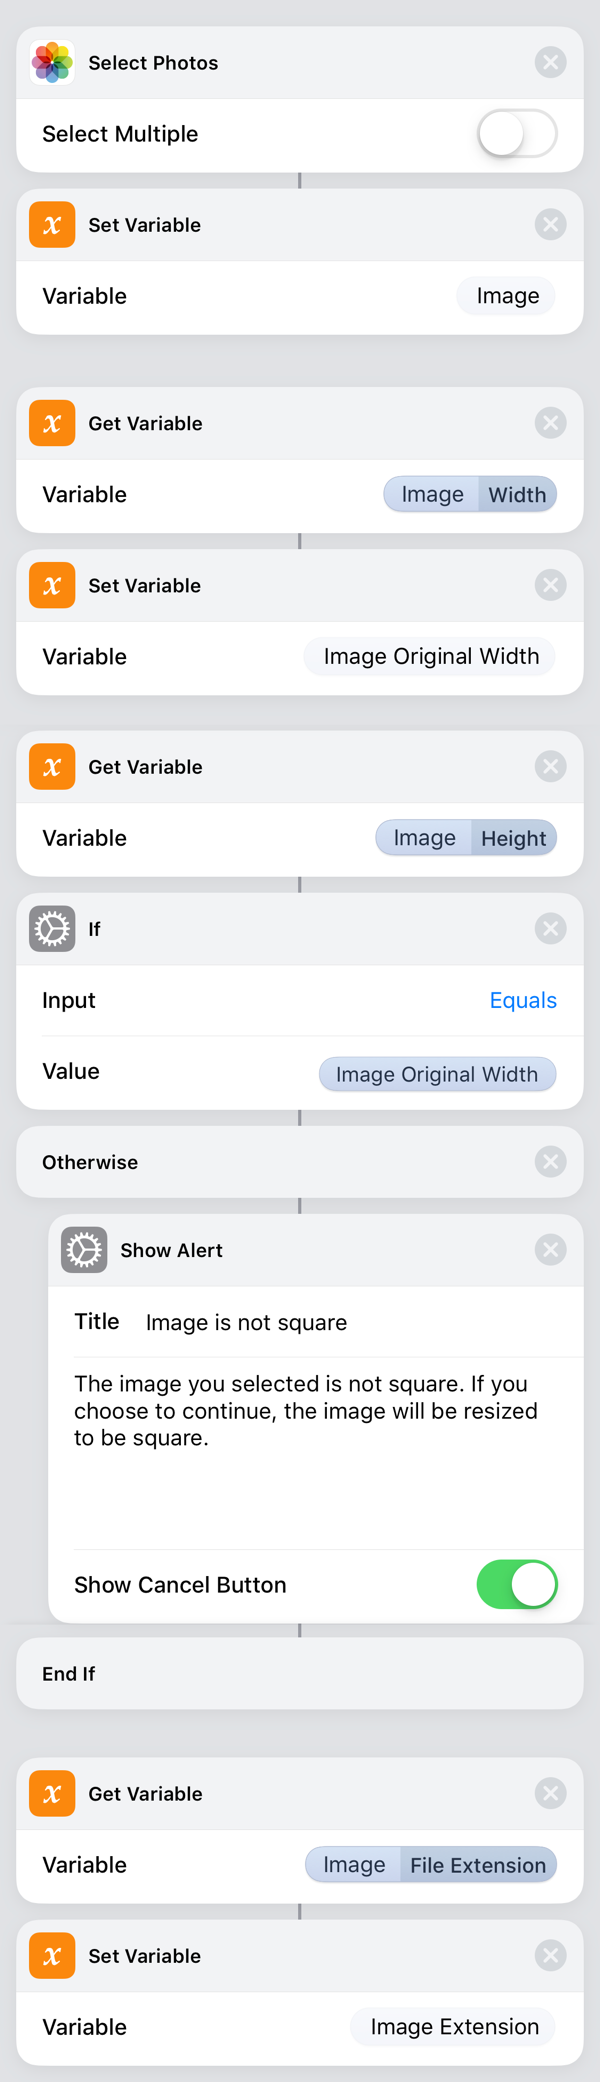
Next, I prompt the user to select an image from the Photos library, which will be used to generate the different icon sizes needed. I save the image to the Image variable and the image file extension to the Image Extension variable.
I also check if the image selected is square. If not, I show an alert to the user warning that the icon will be distorted and asking if they want to continue.
In the future, I plan to add more checks to the image such as making sure the image format is appropriate and the size is at least 512px.
Prepping the directory, manifest file, and head file #
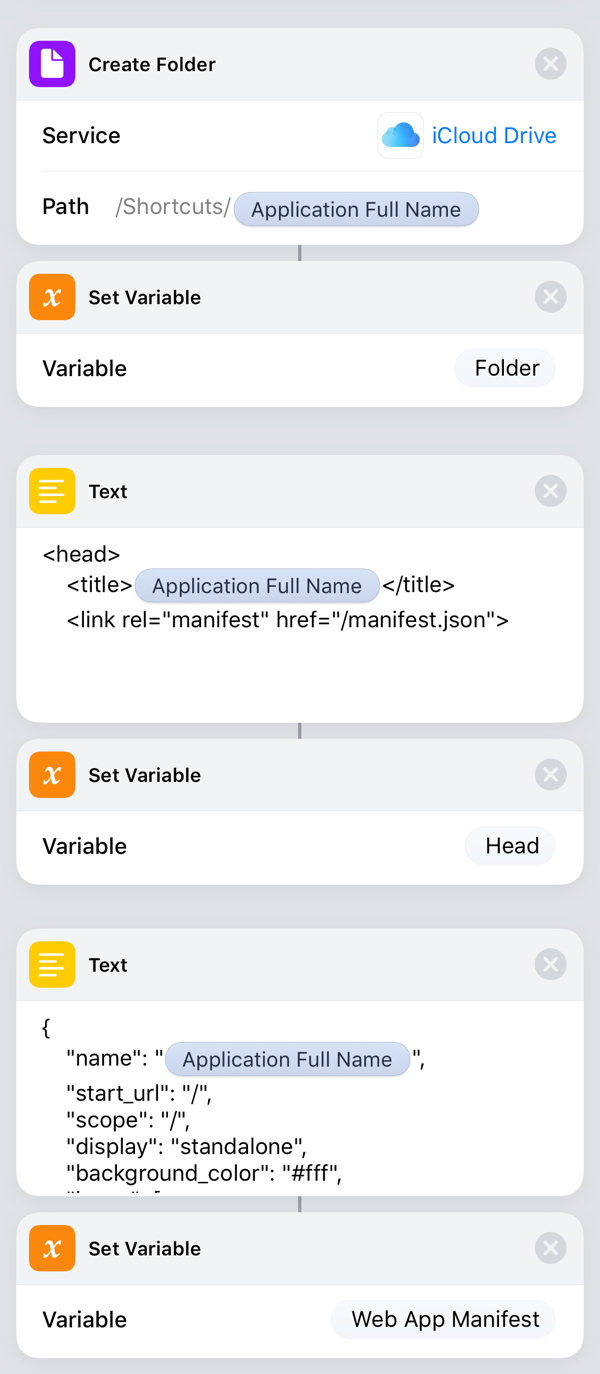
Next, I create the directory that the files will be stored in and save it to the Folder variable. The directory is named after the application name.
Then, I start the files that will become the head.html and the manifest.json. As the shortcut progresses, more will be added to these files.
Generating the icons #
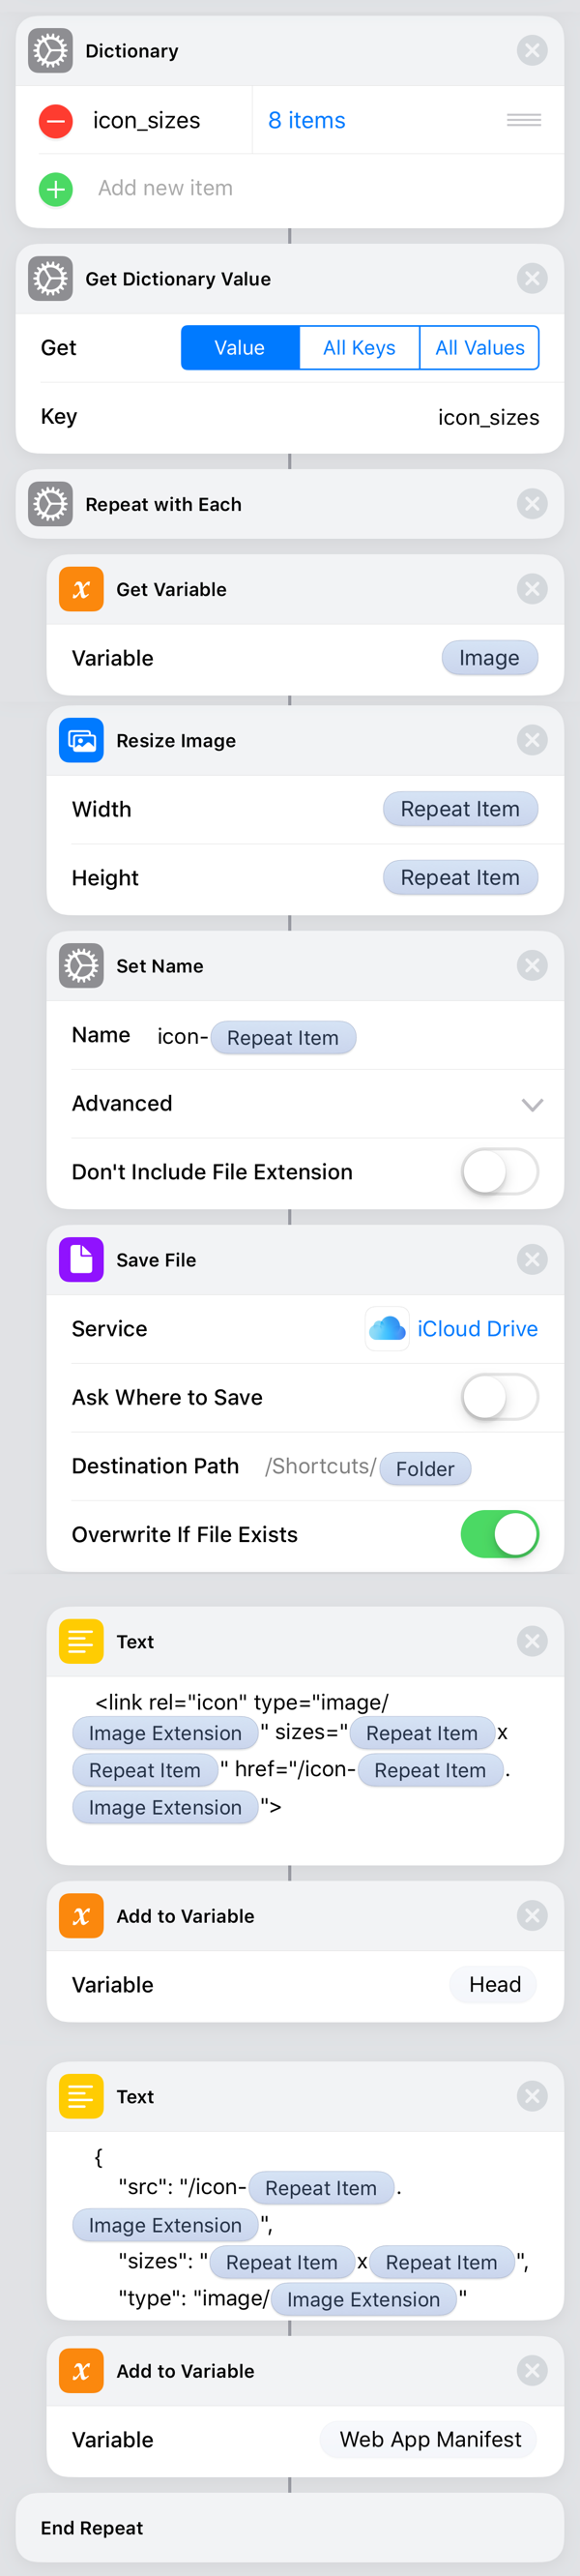
Next is to generate the different icon sizes. I start by creating a Dictionary with an icon_sizes array. This array contains all the icon sizes that we want to generate.
Referencing the Image that was selected by the user, I loop through each icon size and resize the image to whichever size we are currently on in the loop (Repeat Item variable).
In addition to resizing the image, I also add to the head.html and manifest.json files with the icon details.
Completing the head.html and manifest.json #
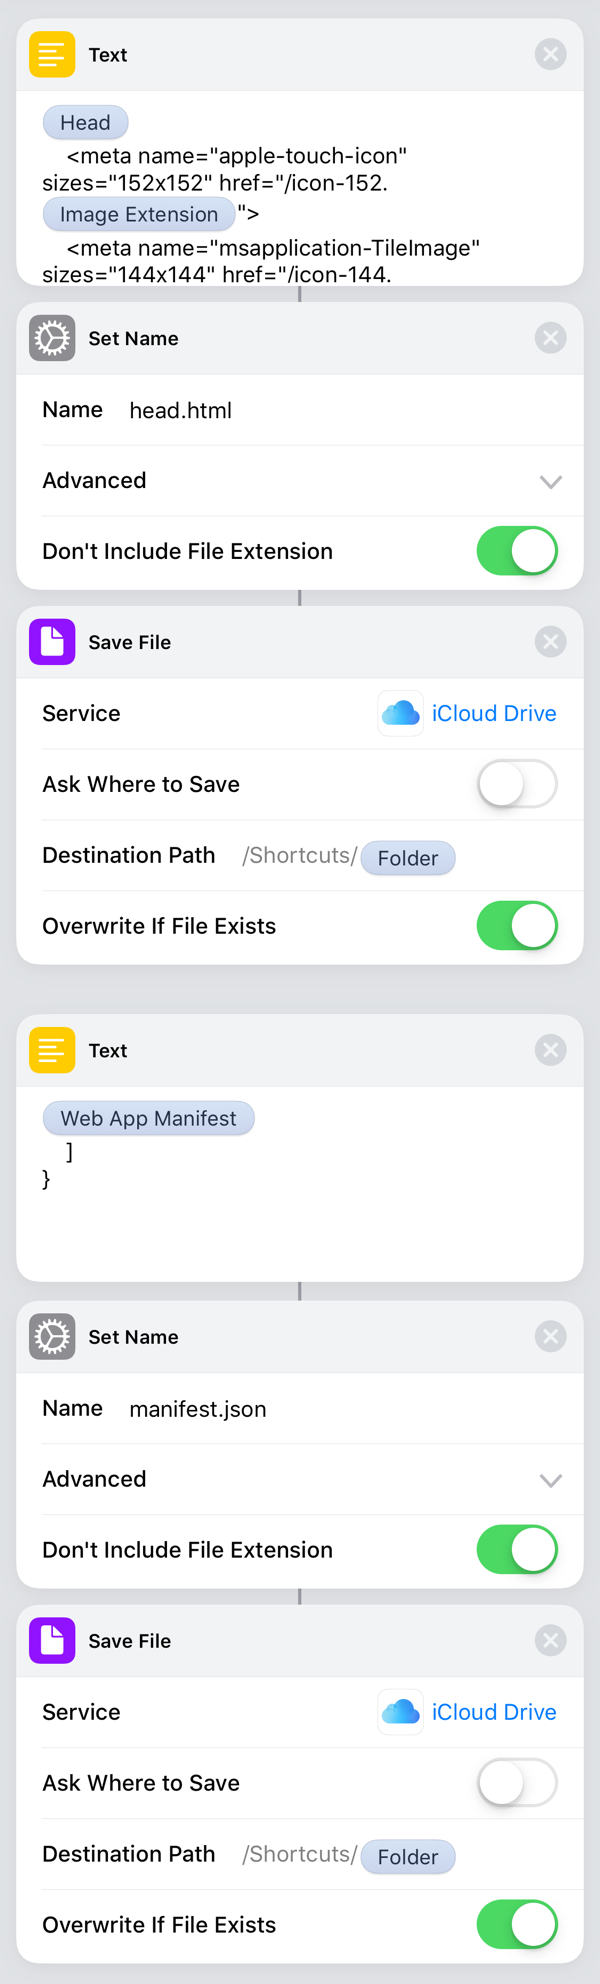
Finally, I complete the head.html and manifest.json files and save them to the same directory.
Get the shortcut #
If you want to use the shortcut yourself, you can download the shortcut here.