How display: contents; Works
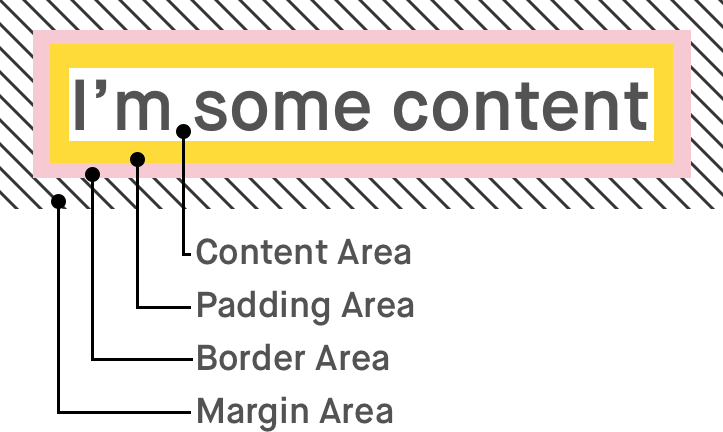
As I frequently mention, every element in the document tree is a rectangular box. Broadly speaking, this "rectangular box" consists of two sections. First we have the actual box, which consists of the border, padding, and margin areas. Second, we have the contents of the box; the content area.
With the CSS display property, we can control different things about how this box and its children are drawn on the page. We can have the box be placed within its siblings like text with inline. We can even trick the box into behaving like a table with table.
There are only two values for the display property which control whether an element defined in the markup will generate a box at all. The none value will result in neither the box or its contents being drawn on the page. The newly specced contents value, on the other hand, will result in the contents of the box being drawn as normal, but the surrounding box being omitted entirely.
What happens when you use display: contents? #
The easiest way to understand what happens when display: contents is used is to imagine the element’s opening and closing tags being omitted from the markup. In the specification, it states -
For the purposes of box generation and layout, the element must be treated as if it had been replaced in the element tree by its contents
Let's take, for example, the following markup -
<div class="outer">
  I’m some content
  <div class="inner">I’m some inner content</div>
</div>
And the following styles -
.outer {
  border: 2px solid lightcoral;
  background-color: lightpink;
  padding: 20px;
}

.inner {
  background-color: #ffdb3a;
  padding: 20px;
}
Typically, this is how we would expect the elements to be drawn on the page -
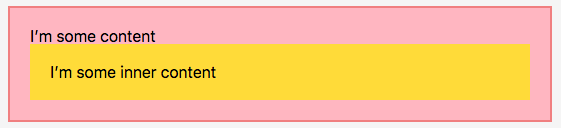
However, if we add display: contents to the .outer element, this is how it is displayed -

Visually speaking, the above result is exactly the same as what we would expect if the markup was written without the opening and closing tags of the outer element.
I’m some content
<div class="inner">I’m some inner content</div>
What about…? #
This CSS rule, although seemingly straightforward, has quite a few edge cases and specific behaviours to take note of. We have to remember that the display: contents rule only affects the box being visually drawn on the page; it does not affect the markup within the document.
What about the element’s attributes? #
If the element is effectively replaced by its contents, what does that mean for any attributes applied to it? Since this replacement is, for the most part, visual only, we can actually still select, target, and interact with the element using its attributes.
We can still target the element by its ID by, for example, making a reference to it using aria-labelledby.
<div id="label" style="display: contents;">Label here!</div>
<button aria-labelledby="label"><button>
However, the one thing I have found that doesn't work properly is that we can no longer navigate to the element using a fragment identifier.
<div id="target" style="display: contents;">Target Content</div>

<script>
  window.location.hash = "target";
  // => Nothing happens
</script>
What about JavaScript events? #
As we have just covered, we can still target an element with display: contents applied to it. In fact, we can target an element with display: none applied, but the event will never trigger because we cannot interact with the element. However, since the contents of an element with display: contents are still visible, we can interact with the element through its contents.
If we set an event listener for a click on the element, for example, and log the value of this, we will still get the outer element because it still exists in the document.
<div class="outer">I’m some content</div>

<script>
  document.querySelector(".outer").addEventListener("click", function(event) {
    console.log(this);
    // => <div class="outer"></div>
  });
</script>
What about pseudo-elements? #
The pseudo-elements of an element with display: contents are considered to be part of its children, so are displayed as normal.
<style>
  .outer { display: contents; }
  .outer::before { content: "Before" }
  .outer::after { content: "After" }
</style>

<div class="outer">I’m some content</div>
The above markup will generate the following result -

What about form elements, images and other replaced elements? #
Replaced elements and some form elements have a different behaviour when display: contents is applied to them.
Replaced elements #
Replaced elements are elements, such as images, whose appearance and "boxes" are controlled by an external resource. Attempting to remove the box for elements like this doesn't really make sense because it isn't entirely clear what the "box" is. For these elements, display: contents functions exactly like display: none. The entire box and contents of the element are not drawn on the page at all.
Form elements #
For many form elements, they are not composed of a single "box". They look like that from the perspective of us, the web page authors. But under the hood, they are made up of several smaller elements. Similarly to the replaced elements, it doesn't make sense to remove the box, because there isn't one box. And so, for form elements like <select>, <input>, and <textarea>, display: contents functions exactly like display: none.
(See the full list of elements that display: contents works differenly for)
What about buttons and links? #
Both the <button> and <a> elements do not have any special behaviour when it comes to display: contents. However, it is useful to know how this rule affects them because it may not be immediately obvious.
Buttons #
Buttons are not one of the form elements which are composed of other boxes. Therefore, display: contents will just remove the surrounding box, leaving the content of the button displayed. If used within a form, clicking the button will still attempt to submit the form and, as we have covered, any event listeners on the button will function normally.
Links #
For links, the same applies in that the surrounding box is visually removed, leaving the contents of the link behind. Since attributes aren't generally affected by this CSS rule, the link will still function properly and can be used to navigate as normal.
Why is display: contents useful? #
In the past, we have had to lay out our HTML in a way that works both semantically, and for the purposes of styling with CSS. This has led to cases where we either have too many unnecessary elements for wrapping purposes, or too few elements to enable direct sibling styling. The latter has become particularly pertinent with the introduction of CSS Grid Layout which, for now at least, needs to work with direct sibling elements.
Let's take, for example, this layout -
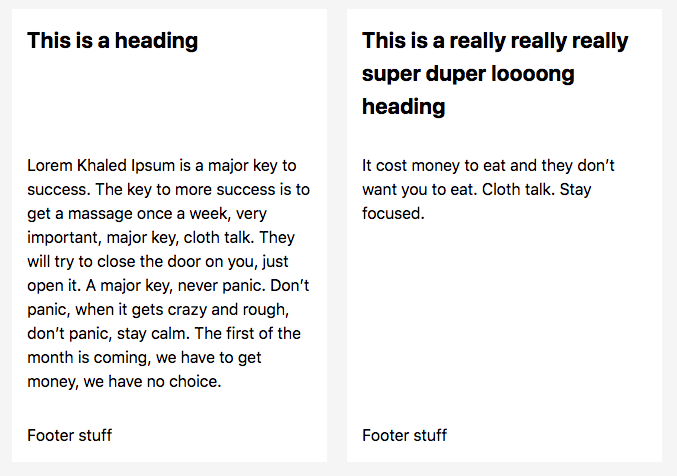
We have two "cards" placed next to each other, each with a heading, a pargraph, and a footer. What we want is for each of the sections within each card to be the same height, regardless of the content of each section (e.g. the first card has only a 1-line whereas the third card has a 3-line heading, but the first card heading section height should match the third).
We could achieve this layout using CSS Grid, but we would need all the elements within each "card" to be direct siblings of each other. So, we may have to layout our HTML like this -
<div class="grid">
  <h2>This is a heading</h2>
  <p>...</p>
  <p>Footer stuff</p>

  <h2>This is a really really really super duper loooong heading</h2>
  <p>...</p>
  <p>Footer stuff</p>
</div>
And we could apply the following styles -
.grid {
  display: grid;
  grid-auto-flow: column;
  grid-template-rows: auto 1fr auto;
  grid-template-columns: repeat(2, 1fr);
  grid-column-gap: 20px;
}
Although this is not exactly an incorrect way to structure this document, it probably makes more sense to group each "card" within an <article> element. This is where display: contents comes in. We can have the best of both worlds here - by laying out our markup in a way that makes sense semantically, but having our CSS act in a way that makes sense layout-wise.
<div class="grid">
  <article style="display: contents;">
    <h2>This is a heading</h2>
    <p>...</p>
    <p>Footer stuff</p>
  </article>
  <article style="display: contents;">
    <h2>This is a really really really super duper loooong heading</h2>
    <p>...</p>
    <p>Footer stuff</p>
  </article>
</div>
With the same CSS as above, we can achieve the layout we want.
Using display: contents #
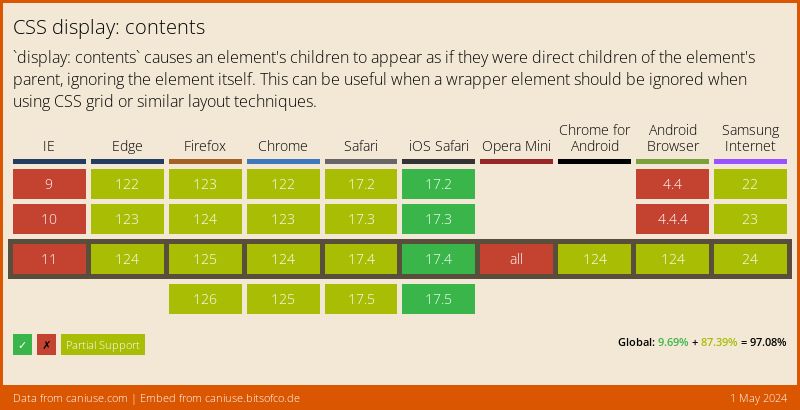
At the time of writing, display: contents is only supported in two major browsers, with support arriving soon in many others.
Because of this, this feature should still currently be considered a progressive enhancement, and an appropriate fallback should be used.
article {
  display: grid;
  grid-template-rows: 200px 1fr auto; /* e.g. Use a fixed height for the header */
}

@supports (display: contents) {
  article { display: contents; }
}