Making Alix, a Chrome Extension for Linting HTML
Last week, I wrote about how you can use CSS selectors to help lint your HTML. The general idea behind this concept was that we can use some of the more advanced CSS selectors, such as :not(), to select certain types of elements in the document. For example, we can select all images that don't have alternative text, and apply styling to highlight them on the page.
img:not([alt]) {
    border: 5px solid red;
}

/* Add an error message */
img:not([alt])::after {
   content: "Images must have an alt attribute";
}
Since writing that article, I discovered that quite a few other people have used this idea before. However, the most extensive one I have found was a11y.css, created by Gaël Poupard. So, instead of creating my own, I've decided to just help make that one better.
To make this much easier to use for anyone, I decided to make it into a browser extension (in this case, Chrome).
Get the Extension | View Source
The extension allows you easily apply the stylesheet to any page. Here's how I made it.
Declaring a Chrome Extension: The Manifest #
The first thing we need to do to create an extension for Chrome is to create a Manifest file. This works in a similar way to the manifest file we create for Progressive Web Apps. It includes various bits of information that Chrome needs to determine what the extension does, and what permissions it requires.
This is the manifest.json file for Alix -
{
  "manifest_version": 2,

  "name": "Alix for Chrome",
  "short_name": "Alix",
  "description": "Lorem ipsum",
  "version": "1.1",

  "permissions": [
      "activeTab"
  ],

  "browser_action": {
    "default_title": "Toggle Alix",
    "default_popup": "popup/index.html",
    "default_icon": {
      "19": "images/toolbar-chrome.png",
      "38": "images/toolbar-chrome@2x.png"
    }
  },

  "icons": {
      "128": "icon_128.png",
      "16": "icon_16.png",
      "48": "icon_48.png"
   },

  "web_accessible_resources": [
    "a11y.css/a11y-en_advice.css",
    "a11y.css/a11y-en_error.css",
    "a11y.css/a11y-en_obsolete.css",
    "a11y.css/a11y-en_warning.css",
    "a11y.css/a11y-fr_advice.css",
    "a11y.css/a11y-fr_error.css",
    "a11y.css/a11y-fr_obsolete.css",
    "a11y.css/a11y-fr_warning.css"
  ]
}
Here's what some of the options mean -
-
manifest_version: The version of the manifest file format that the extension requires. As of Chrome 18, version 2 is required. -
permissions: The permissions your extension is requesting access to. Alix only requires access to whichever tab is currently active at the time. -
browser_action: This puts an icon in the main Chrome toolbar, and allows us to specify an action to be taken when that icon is clicked.default_title: The default title for the toolbar icon.default_popup: The HTML page to load when the icon is clicked.
-
web_accessible_resources: An array of paths to resources that may be used on the web page.
Creating the Popup #
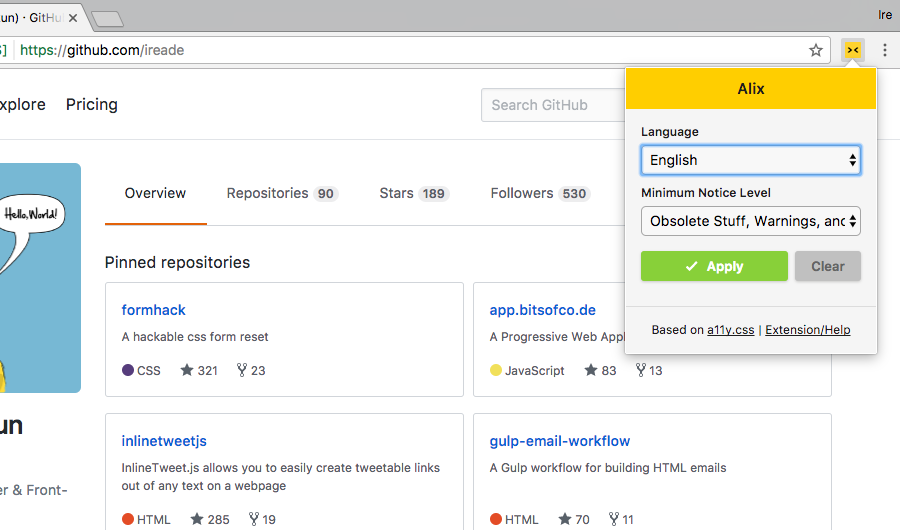
The popup is just a simple HTML page, which we linked to in our manifest file under browser_action/default_popup. By defining the popup here, it is automatically triggered when the toolbar icon is clicked.
We can style this page any way we want like any regular HTML page.
Applying the a11y.css Stylesheet #
Finally, what we want to do is apply the relevant a11y.css stylesheet to the current active tab. To do that, we have to run a script on the tab which will create a <link rel="stylsheet"> element on the page, linking to the a11y.css stylesheet.
To run a script on the current active tab, we can use the chrome.tabs.executeScript() method. This method accepts an object with some options. The relevant option for this purpose is code, to which we pass a string of the code we want to be executed.
function addStylesheet() {

    // Get file path based on language and level options from form
    const file = `/a11y.css/a11y-${options.language}_${options.level}.css`;

	const code = `
		var stylesheet = document.createElement("link");
		stylesheet.rel = "stylesheet";
		stylesheet.href = chrome.extension.getURL("${file}");
		stylesheet.id = "a11yCSS";
		document.getElementsByTagName("head")[0].appendChild(stylesheet);
	`;

	// Execute script on active tab
    chrome.tabs.executeScript({code: code});
}
If we inspect the page, we can see that the stylesheet has been added as the last element in the document head.
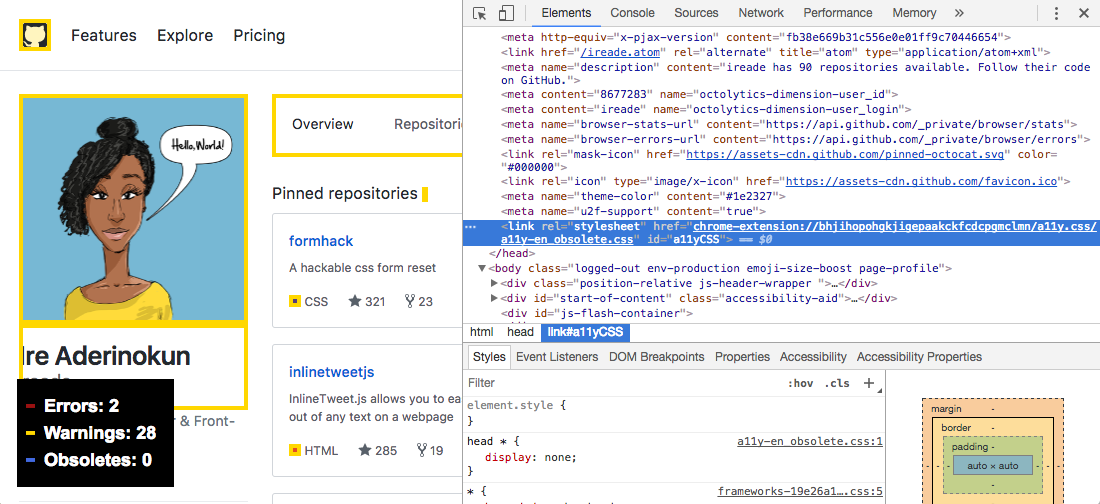
That's it! As always, you can view the source code or install the extension from Chrome Web Store.
Thanks to Gaël Poupard for creating a11y.css!