Using Jekyll for Rapid CSS Testing
Last week, I gave a talk at JekyllConf, the free online global conference for all things Jekyll. My talk, "Using Jekyll for Rapid CSS Testing", was about how I use Jekyll to quickly and easily create visual demos of CSS properties and their potential values. Using this method, I created cheatsheets.bitsofco.de, where I display the resulting demos. Here's an example of the cheatsheet for Flexbox -
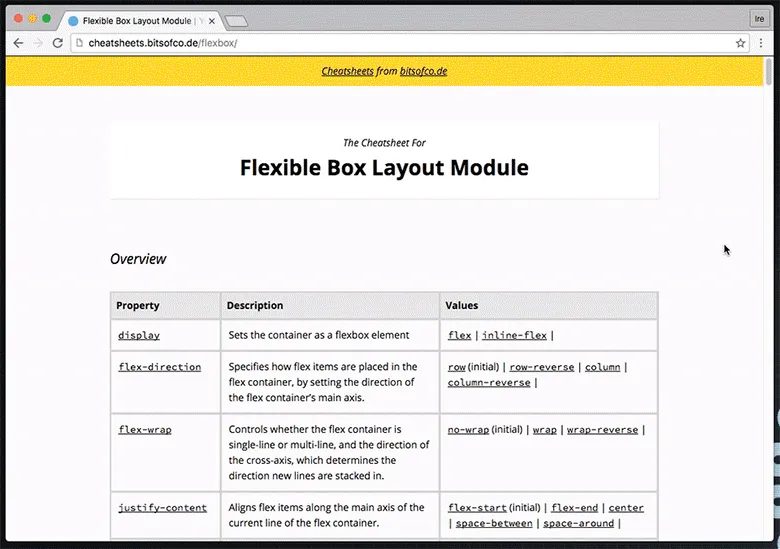
You can watch the full talk here, but here is an overview of the method I used to create the site.
Setting up the Jekyll Site #
The Cheatsheets site uses Jekyll in a rather unconventional way. There are no blog posts, as is usually expected and instead we have “cheatsheets” (e.g. the cheatsheet for Flexbox or object-fit & object-position).
If we want to use Jekyll for groups of content other than blog posts or pages, we can use what is called a custom collection. To create a custom collection, we define it in the _config.yml file. This is how the cheatsheets custom collection is defined -
collections:
  cheatsheets: # The name of the custom collection
    output: true  # Makes the collection public
    permalink: /:path/ # Sets the permalink structure
We can also specify default front matter for custom collections. For example, instead of having to set the layout for each cheatsheet in the front matter of each file, we can set this as the default behaviour in the _config.yml file.
defaults:
  -
    scope: # Sets the scope of the defaults we are about to set to cheatsheets collection
      type: "cheatsheets"
    values: # The default values
      layout: "cheatsheet"
When a custom collection is created, Jekyll expects the files within that collection to be stored in a directory titled after the name of the collection. So, the files within the cheatsheets collection should be in a directory titled _cheatsheets.
The resulting directory for the Cheatsheets Jekyll site looks like this -
- _cheatsheets/
- _data/
- _includes/
- _layouts/
- _sass/
- _site/
- css/
- js/
- _config.yml
- index.html
Creating a Cheatsheet #
Once the Jekyll site is setup, we can start creating the actual cheatsheet files. There are 3 files involved to create a cheatsheet.
1. The Data #
Every cheatsheet has a data file, a YAML file stored in the _data directory (e.g. _data/DATA_NAME.yml). This is where the CSS properties and their values are stored. The file contains an array of properties, each with its own array of values.
properties:
- {
  property: 'PROPERTY_NAME',
  values: [
    {
      value: 'VALUE_NAME',
      default: true
    },
    {
      value: 'VALUE_NAME',
    },
  ]
}
- { ... }
- { ... }
- { ... }
Additional information can also be specified here such as a description of the property or value. We can also add custom keys for anything specific to the cheatsheet group. For example, in the cheatsheet for Flexbox, I added a custom key, applies-to, in order to differentiate between properties that apply to the Flex Container versus the Flex Item.
2. The Demo #
This is the actual cheatsheet file, stored in the _cheatsheets directory (e.g., _cheatsheets/CHEATSHEET_NAME.yml). We can link the cheatsheet to the relevant data file from the _data directory by specifying it in the front matter.
---
title: CHEATSHEET_NAME
data_file: DATA_NAME
---

<!-- Demo will go here -->
Once we have linked the data to the page, we can now create the demos of the properties in the file. In the content of the page, we can loop through each property in the data file and each value for each property.
<!-- Loop through each property -->
3. The Layout #
This file defines the layout for the cheatsheet page (_layouts/cheatsheet.html). As specified in our _config.yml file, it is the default layout for all files within the cheatsheets collection.
In addition to laying out the key elements on the page such as the header and footer, it also creates a table of all the property-value pairs so a complete overview can be seen on one table.
<table>
  <thead>
    <tr>
      <th class="property">Property</th>
      <th class="description">Description</th>
      <th class="values">Values</th>
    </tr>
  </thead>
  <tbody>
    <!-- Loop through each property -->

  </tbody>
</table>
An Example #
Here is a very basic example of a cheatsheet for one property, text-align. The data file, _data/text-align.yml, only contains one property, text-align, which has four potential values.
properties:
- {
  property: 'text-align',
  description: 'Describes how inline-level content of a block container is aligned.',
  values: [
    {
      value: 'left',
      default: true
    },
    {
      value: 'right',
    },
    {
      value: 'center',
    },
    {
      value: 'justify',
    }
  ]
}
The cheatsheet file, _cheatsheets/text-align.html, applies the property-value pairs we are testing to a <div> containing a single paragraph -
---
title: Text-Align
data_file: text-align
---

<!-- Loop through each property -->


<!-- Note: I've removed the classes and IDs on the elements for clarity -->
Here's the result we get -

The Cheatsheets site can also handle much more complex situations. For example the object-position property, whose values are not static but can be a range of length units. You can watch the talk to see how I handle those situations, and how the data file can be modified to allow for them. You can also find the source for the Cheatsheets site at my repository, ireade/cheatsheets.
I plan on adding more cheatsheets to the site as I test more CSS properties. If there's anything you'd like to see in particular, let me know.